

Wireless Options:

System Options:
This tutorial is to help you get connected to Nintendo Wifi with a dial-up connection. Even though lots of people think that wifi with dial-up would lag and cause the people with high speed internet to go slow, but that is not true. At normal dial-up speed (56kb) it will go just about as fast as high speed internet; the only thing that will happen if you have a really slow dial-up connection or if you're downloading on the internet at the same time you will just see the other characters of the other people you are connected to go slow or bounce and the other people will just see your character go slow or bounce on their screen.
Language Options (Opciones De la Lengua):
Wireless Options:
![]()
System Options:
![]()
![]()
Nintendo wifi with dial-up FAQ
If you have a Mac this web site might help you out with the Internet Connection Sharing part, and this post on the Nintendo Forums called Conecting using Apple Share can help you get the IP Address that you need to enter into the DS.
You can use any wireless router you want just as long as it's compatible with the Nintendo DS.
Things you need:
1 computer that has access to the internet
1 wireless router or Nintendo wifi USB connector
1 Nintendo DS
1 Wifi compatible game
1. Go to a computer that has access to the internet
2. Click Start, then Control Panel, then click Network Connections
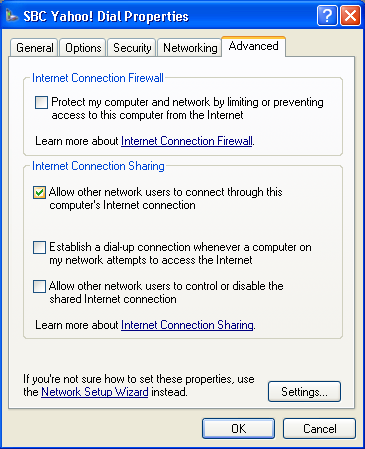
3. Right click your dial-up connection, then click Properties and then click the Advanced tab
4. Click the Allow other users to connect through this computer's Internet connection checkbox
5. Now connect to your dial-up connection
Note:
If you have connected to your dial-up connection before you enabled Internet Connection Sharing you have to disconnect and then reconnect again.
In windows 95,98,98 SE and Me you first have to install Internet connection Sharing.
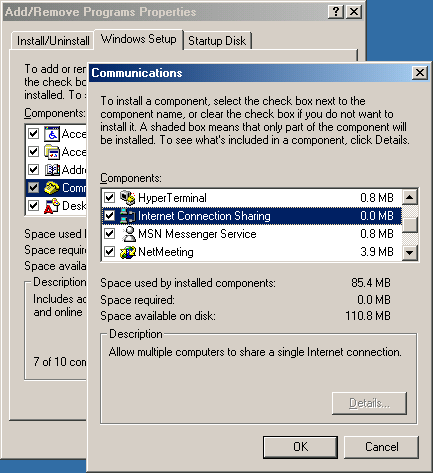
2. Click Start, then Settings, then Control Panel, then click the Add/Remove Programs icon, then Click the Windows Setup tab and then click Communications
3. Click the Internet Connection Sharing check box and then click ok to install it
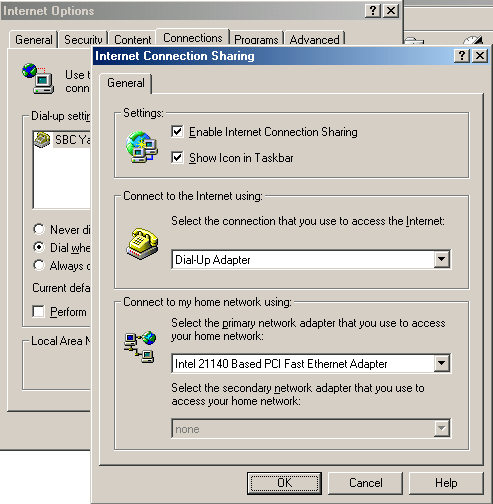
4. Click Internet Explorer, then click Tools, then click Internet Options and then click the Connections tab
5. Click the Sharing button and then set the settings to share a dial-up connection and pick the Network adapter that you use to connect to your router and then click ok
Note:
In Windows 95,98,98 se and Me you might have to restart you computer after you install Internet
Connection Sharing and after you set the settings for Internet Connection Sharing.
1. Click Start, then Programs, then Accessories, then Command Prompt (MS-DOS Prompt in Windows 95,98,98se and me)
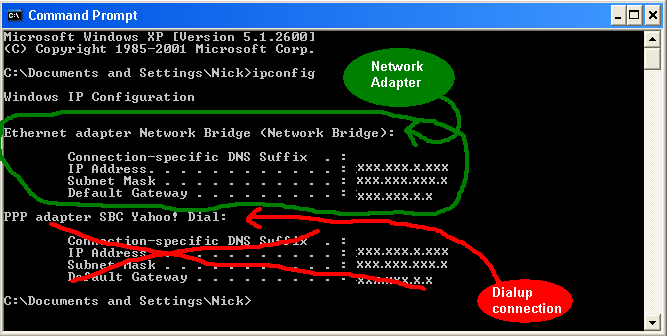
2. Type ipconfig and then keep the command prompt window on
3. If you are already connected to the internet through dial-up the ip address settings for the dial-up will show up, but you do not need this information so you can just ignore it.
4. Now keep the command prompt on the computer screen while you go to your Nintendo DS to enter the information, Remember to enter the Network adapter information and not the dial-up information, if you do enter the dial-up information it will not work
Note:
If you're using a Mac Open Terminal.app and type ifconfig en1, more info about using Apple Share with Nintendo Wifi Connection at Conecting
using Apple Share posted on the Nintendo Forums.
1. Insert your Nintendo Wifi enabled game into your Nintendo DS and turn your Nintendo DS on
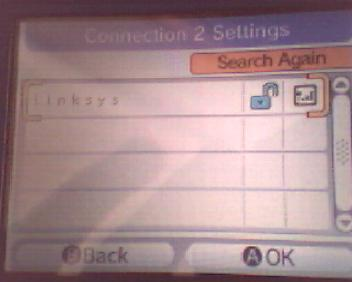
2. Go to the Nintendo Wifi Connection Settings screen, then pick a connection number you want to use (Connection 1 is recommended) and then click Search for a access point
3. Pick the router name that you use, then it will do a connection test, but it wont work because the ip address and other setting are not setup yet
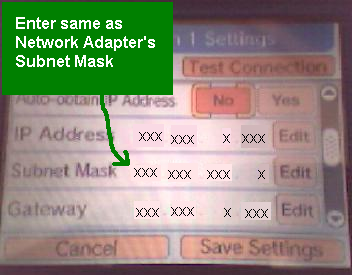
4. Go to the connection that you just set up your router on an then pick No on
Auto-Obtain ip address
5. put the same ip address as the network adapter, but add a 2 or something to make it different (if its the same ip address as the Network Adapter you will get a error on your computer saying that a ip address conflict occurred from another computer on the network)
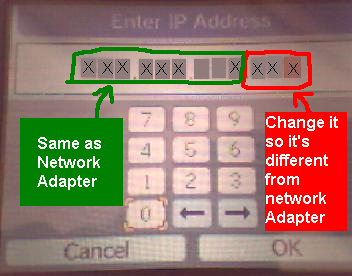
6. Put the same Subnet mask as the Network adapter
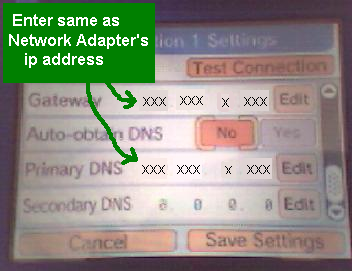
7. Put the ip address of the Network adapter as the Gateway and Primary DNS
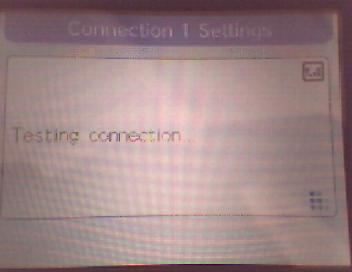
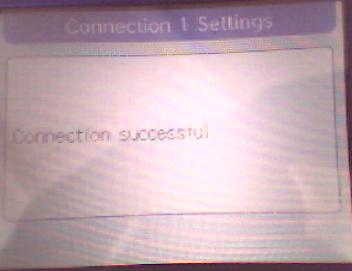
8. Tap Save Settings and then test the connection to see if it works; if it does then you can now play
games on Nintendo Wifi and if it doesn't check to make sure if you put in the right information from the command prompt
If you have any comments, questions or you need more help you can email me at nickjuly4@hotmail.com